
You should be properly afraid when it comes to ensuring ultimate safety while working with ladders. So, allow us to scare you enough to be cautious, as it will save your life.
The WHO reports that the U.S. is a world leader in ladder deaths. More specifically, over 300 injuries with death outcomes and 164,000 emergencies caused by falls from ladders occur in the States every year.
Help us beat these horrible statistics. Read on and learn how to inspect and properly stabilize a ladder before you start working. We care, do you?
Know your ladders
Your preparation for work starts with knowing which kind of ladder you need for the job. This is the first step (or rung, in ladder jargon). It implies that inspection and adequate positioning of the ladder depends on its type. In general, there are six types of ladders
- stepladders (maximum length 20 feet/6.1 m);
- straight or single pole ladders (maximum length 29.5 feet/9 m);
- extension ladders (maximum length 49 feet/15 m);
- trestle ladders;
- platform ladders;
- multi-way ladders.
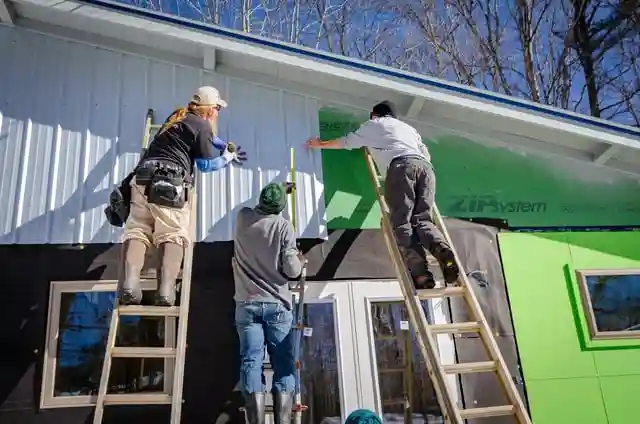
Stepladders, single ladders, and extension ladders are the most popular and most commonly used in our homes. It makes it all the more important to explain to DIY handy(wo)men how to inspect, properly climb ladders, use them safely, and keep others safe at the same time.
Although there are several duty ratings representing the total weight the ladders can hold, we’ll focus on Type III. These are the ladders for light-duty household usage that can bear up to 200 pounds/97 kg. This includes the total weight of the person on ladders, as well as their materials and tools.
Preparation phase: Inspection
No tips on proper ladder setup will help you if they aren’t in excellent working condition. What does inspecting your ladders involve, and how does it help you properly stabilize a ladder? Red flags include corrosion, signs of wear, and structural issues that can cause the ladder to collapse mid-work. In other words, during your ladder check-up, focus on looking for
- Damaged rungs. Steps may be corroded, bent, or even missing.
- Cracked side rails. Wooden ladder rails are particularly prone to splitting and cracking if not properly maintained and stored.
- Bent rungs and rails. If the ladders have to support a greater weight than designed by the manufacturer, their parts bend, weaken, and lose structural integrity.
- Weakened hardware. Loose or corroded fasteners are another weak spot. Test them and check if any little part is missing.
- Damaged, loose, or missing ladder feet. If your ladder should have both metal feet (for soft surfaces) and nonskid feet (for hard surfaces), check if they’re fastened well and in good condition.
Finally, ascertain the steps and rails are clean. You must remove oil, grease, and every other slippery substance from the ladder rungs to ensure your safety during climbing up and down and work.
Preparation for using extension ladders also includes the inspection of the terrain you will set up the ladders on. Avoid wet, soggy, muddy, and snow and ice-covered surfaces.
Setting up the ladders
Hopefully, you know which type of ladders will suit you best. But if you plan to work with electricity, avoid the conductive ladder altogether. Aluminum ladders are not a good choice of tools for this kind of work; use wooden or fiberglass ladders instead.
And now, it’s time to discover how to safely position and properly stabilize a ladder before starting your repair, cleaning, or remodeling tasks. The correct process of placing the ladders is, for convenience, split into three parts.
#1 How to extend the ladders and secure the footing
Extending the ladders safely is a process that ensures you avoid injuries due to heavy lifting and damage to your home. Firstly, put the ladders on the ground with their feet at the base of the house.
Stand at the top of the ladders, place your hands on the topmost rung, and slowly raise the ladders above your head, moving your hands down the rungs. Once the ladder is almost upright, grab the rung at the height of your thigh, lift the ladders slightly off the ground and walk them away from the wall base.
To extend the ladders, use the rope. Pulling on the rope will raise the fly (the telescopic part of the ladder) to the needed height. Rung hooks on both sides should lock securely before you tie off the rope at the lowermost rung of your ladder.
Now, position the ladders at the safest possible angle of 75 degrees. If you did, it means you have followed the golden rule of ladder placing, a 4:1 ratio. It means that the height of the ladder at the resting point is four times the distance of the ladder base from the wall.
If you’re placing the feet on concrete or other dry hard surfaces, ensure that the rough rubber pads of the feet are in contact with the surface. In case of soft terrain, turn the textured rubber pad up, and push the pointed metal end of the feet into the ground.
Set the ladders firmly on the ground. Both ladder feet must make contact with the surface. If they don’t, level the ground beneath the feet instead of stacking various materials. There should be nothing between ladder feet and the ground.
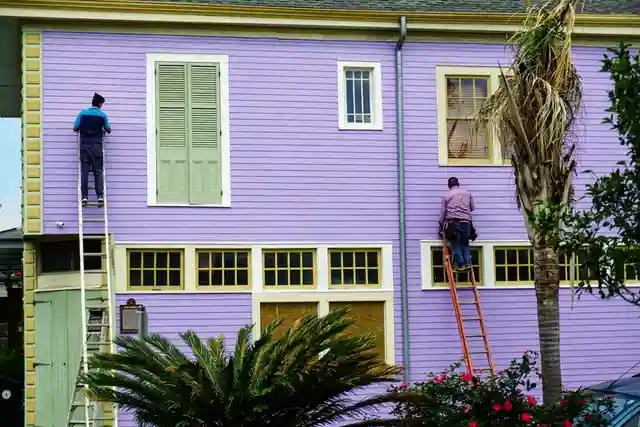
#2 Correct ladder placing and stabilizing on exterior walls
You’ve got the right footing and have set the proper angle but don’t forget to look up! Ensure your ladders are far enough from the electrical and other wires, fragile glass surfaces, and the edge of the exterior wall.
To make sure your ladders are well stabilized around windows, use standoffs. These ladder add-ons ensure the better stability of your ladders and put you at a comfortable working distance from fragile surfaces.
Another accessory that will help you properly stabilize a ladder against the wall is large rubber or soft plastic pads. The so-called rubber mitts are placed over the top of the rails for a better ladder-to-wall grip and to prevent the ladder from slipping sideways. They are an excellent addition to standoffs and protect the house exterior from possible scratches by ladder rails.
At this point, it is vital to emphasize that ladders are used indoors as much as for outdoor work. Typically, they serve best during home renovations but also during moving preparations if you need to reach something high, for instance.
Falling, in this case, would constitute a moving injury. Typically, you would avoid such mishaps by hiring a moving crew. In this case, learning how to position, secure your ladders in place, and climb and descend will ensure you stay safe on your moving day and later when the time comes for renovation.
To do so, you need to hold the rungs, not the rails, when climbing up and down the ladder. Use both hands to grab the rungs, always facing the ladders. If you need to bring the tools up, wear a holster or strap a tool belt. Position your hips between the rails at all times, and avoid leaning left or right at all costs.
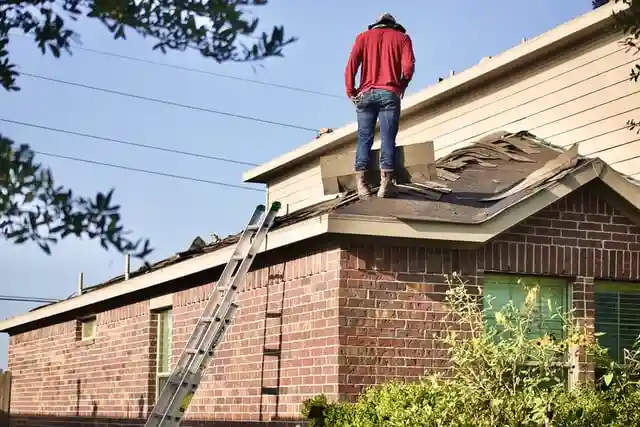
#3 Ladder placement for roof and gutter inspection and work
One of the most common DIY works around the house where homeowners need ladders is gutter cleaning and repair. Note that, when cleaning gutters, correct ladder placement is half the work. It involves setting the top of the ladder at least 3 feet/1 m above the point of contact. Moreover, it would be best if you didn’t climb further than the fourth rung from the top.
Before climbing up, ensure that you, together with the tools you carry, don’t exceed the ladder weight limit. Confirm that your tool belt or holster is fastened tightly and don’t move as you climb. Furthermore, the materials you’re about to bring up the ladders should always remain between the rails. If you overreach at any side, the weight of your tools can sway you and make you a part of those ugly statistics.
One last note: Safety first
When using the ladders, there aren’t shortcuts. You don’t rush up, or down the ladder rungs, you don’t slide down the rails, and you definitely don’t turn your back to the ladders. Perhaps your homeowner’s insurance will cover the fall from ladders, but that is beyond the point. Would you rather mend or prevent? The answer imposes itself.
Hence, you should do your best to avoid injuries while you can. It implies ensuring that you got the right ladder for the specific job, that this helpful tool is in good condition, that you properly stabilize a ladder, and that you are taking all precautions while stepping and working on it. Now you know how to do it!
Image credits – Photos by Zohair Mirza, Andrew Neel, Kelly Sikkema, Jens Behrmann, Ricky Singh on Unsplash
Joseph is the owner of LadderGeek. He is a home remodeling enthusiast. He has created this blog to share some of his knowledge on Ladder and accessories.